How to Propagate Rosemary: Choosing the Right Stem, Soil vs. Water, and How Long It Takes
Rosemary cuttings come from a new, non-flowering stem tip about 4 inches long. Plant it in soil mixed with sand, in a bright spot out of direct sun. Learn where to cut without harming the mother plant, whether water rooting is worth it, if rooting hormone is needed, and how long roots take.
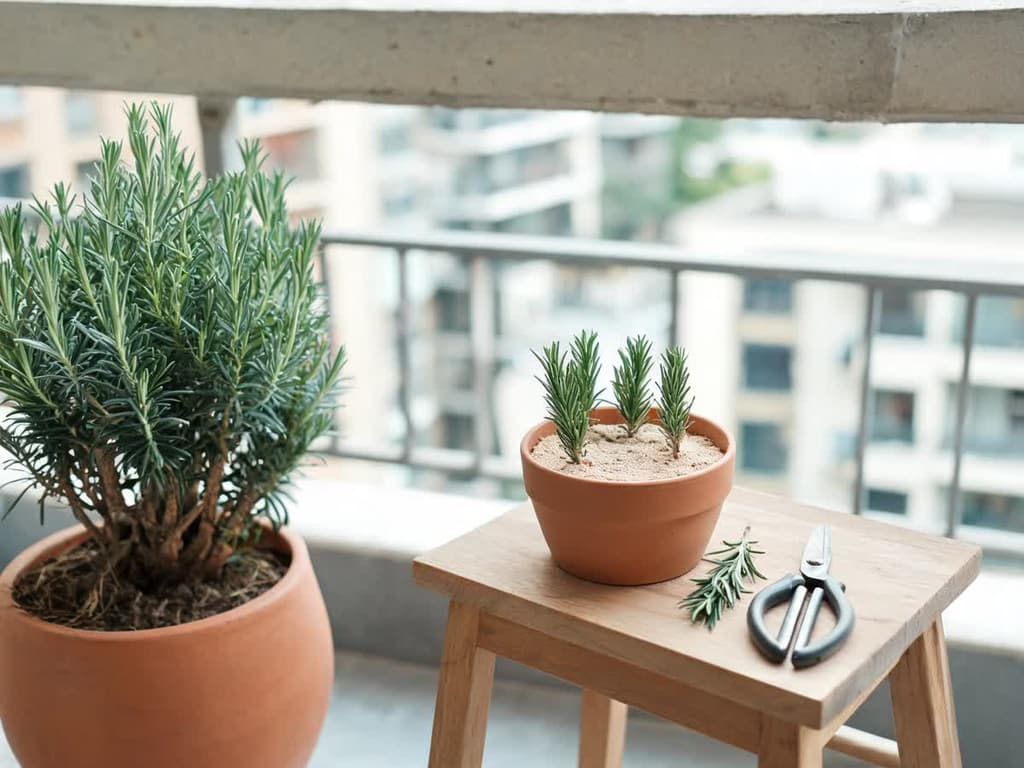
How to propagate rosemary, in short: cut a new stem tip that grew over the last few months, non-flowering and about 4 inches (10 cm) long. Strip the leaves from the bottom half and bury that section in a pot with potting mix blended with sand. Keep the pot in a bright spot without direct sun, keeping the soil moist but never waterlogged. Roots take 4 to 6 weeks.
Not every cutting takes root. NC State is the extension service of North Carolina State University, the department of the university that advises growers. NC State expects 30 to 50% of rosemary cuttings to root (NC State Extension). Because of this, NC State recommends taking 2 to 3 times more cuttings than the plants you want. A cutting, here, is the piece of stem that will grow roots.
Quick summary:
Stem: new tip, non-flowering, with a firm base and a tip that is still soft. Keep the tip.
Size: about 4 inches (10 cm), cut right below a node (the point on the stem where leaves emerge).
Soil: half coarse sand, half potting mix (store-bought potting soil).
Light: bright spot, without direct sunlight, until roots develop. Full sun only after that.
Water or soil: no one has measured this in rosemary. Soil is the safer choice.
Rooting hormone (powdered product sold at garden centers that stimulates rooting): not mandatory. In a Brazilian study, cuttings without any treatment rooted better.
Time: 4 to 6 weeks until roots form.
Which rosemary stem to use for cuttings
Use a stem tip that grew this season, straight, healthy, and non-flowering. NC State calls for green, pliable, non-flowering stems. The Royal Horticultural Society (RHS), the UK horticultural society, describes the stage by touch: the base of the cutting is already firm and the tip is still soft (RHS, semi-ripe cuttings). This stem is called a semi-ripe cutting, halfway between green growth and wood.
Leave the tip of the stem on the cutting. In a study by the Federal University of Technology – Paraná (UTFPR), rosemary cuttings with the tip rooted 93.75% of the time. Cuttings without the tip rooted 72.92% of the time (Cultivando o Saber, 2019). These percentages come from 2.5-inch (6 cm) cuttings in a mini-greenhouse in a nursery. At home, count on the 30 to 50% from NC State. The RHS page on semi-ripe cuttings tells growers to remove the soft tip. This guide follows the study, because it tested rosemary directly. The RHS page applies to climbers, herbs, and shrubs all at once.
Old, brown, woody growth from the base of the plant is not recommended. Extension services at NC State and Pennsylvania State University (Penn State), as well as the RHS, point to stem tips rather than old wood.
Where to cut rosemary without harming the mother plant
Cut right below a node. On rosemary, a node is the point on the stem where the needle-like leaves attach. Both NC State and the RHS instruct cutting there. Use clean, sharp shears.
Take the cuttings from the green tips, spread across various branches of the plant. Do not cut deep: stop before the brown part of the branch, which has no leaves. The RHS warns that rosemary usually does not recover from hard pruning and recommends not cutting into old wood (RHS, growing rosemary). Cutting only the leafy tips is the light pruning the RHS recommends doing every year on rosemary. The cut tip is the same sprig you harvest for cooking.
Plant the cutting right after taking it. NC State explains that cutting stresses the stem and that the sooner it goes into the soil, the better its chances of survival. For that reason, prepare your pot beforehand and cut your stems on planting day.
Did you inherit a fine-leaved shrub that smells like herbs, but you are not sure if it is rosemary? Bloom (available for iOS) identifies plants from a photo of the stem.
How to propagate rosemary step by step
You need a pot with drainage holes, washed coarse sand, potting mix, clean shears, and a pencil.
Fill the pot with the mixture before cutting the stem: half potting mix and half coarse sand. The RHS uses this ratio. NC State accepts sand, perlite (lightweight white granules sold at garden centers), or potting mix combined with either of them.
Cut the stem tip to about 4 inches (10 cm), right below a node. The RHS recommends 4 to 6 inches (10 to 15 cm); NC State recommends 3 to 5 inches (8 to 13 cm).
Strip the leaves from the lower half of the cutting. Keep all leaves on the top half along with the tip.
If you have rooting hormone powder, dip the cut base into it and tap off the excess. This step is optional.
Make a hole in the soil with your pencil near the edge of the pot, as recommended by NC State.
Insert the stripped stem into the hole. No leaves should end up buried.
Firm the soil around the cutting with your fingers so it stays upright.
Water once until water drains through the bottom hole, and discard any standing water in the saucer.
Place the pot in a bright spot, away from direct sun and strong drafts. NC State notes that cuttings should not sit in full sun or face strong winds.
Check the pot every few days, as NC State suggests. Keep the soil moist without waterlogging: water only if the top layer feels dry.
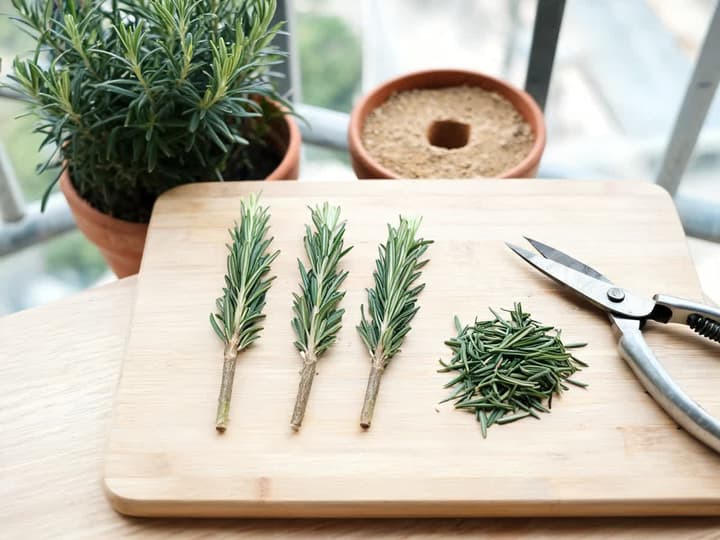
Multiple cuttings can share the same pot, provided their leaves do not touch. Touching leaves trap moisture, and the RHS warns that fungal diseases and rots cause major losses in cuttings without adequate ventilation.
Plastic bottle humidity dome for rosemary cuttings
In the UTFPR study, rosemary cuttings rooted inside miniature humidity domes made from 2-liter soda bottles with their bases cut off and perforated. These mini-greenhouses were kept in a shade house, a nursery structure covered with mesh that filters sunlight. At home, cut the bottle in half and use the top portion, without the cap, as a cover over the small pot.
NC State and Iowa State University (Iowa State) use a clear plastic bag to the same effect. The RHS reminds growers to vent excess moisture. In hot, humid summer conditions, an enclosed cover turns into an oven. Lift the bottle or open the bag once a day to exchange the air. If white mold appears on the soil or heavy condensation runs down the inside, remove the cover permanently.
Rosemary cuttings in water vs. soil
Soil is the safer choice. No studies have tested whether rosemary cuttings root better in water or in soil. Extension services at NC State, Penn State, Iowa State, and the RHS only teach inserting cuttings into well-draining media.
A cutting in soil produces roots directly inside the potting medium. A cutting in water forms roots in a glass and then transitions to soil, having developed water roots. The guide on how to propagate lavender, a plant in the same family and from the same dry climate, arrives at the same preference for soil.
If you want to propagate rosemary in water anyway:
Use a clear glass so you can monitor root development and water clarity.
Submerge only the stripped lower stem.
Check the water every 2 to 3 days and replace it whenever it turns cloudy.
Move the cutting to a pot with soil as soon as the first roots appear.
Keep the pot in a bright spot out of direct sun, just like a freshly planted cutting.
Rooting hormone, cinnamon, and honey on rosemary cuttings
Rosemary roots without rooting hormone. Studies and extension offices differ on whether to use the product:
In a study by São Paulo State University (UNESP), in Botucatu, untreated cuttings outperformed those treated with rooting hormone. The test included IBA (indolebutyric acid, the rooting hormone used in these products) and natural extracts. The untreated cuttings performed better across every measured parameter (Latin American Journal of Development, 2024).
In a UTFPR study, a dose of 2,500 mg per liter of IBA resulted in 98% rooted cuttings (Horticultura Brasileira, 2016). The study abstract does not report the result for cuttings without IBA.
Penn State instructs gardeners to dip the base in rooting hormone. Iowa State says it is not necessary for all cuttings.
This guide follows the Botucatu study because it compared treated and untreated cuttings within the same trial. Rooting hormone is optional. If you already have the powder at home, prepare half of your cuttings with it and half without.
No one has measured the effect of cinnamon on rosemary cuttings. Honey was tested in a study in Tocantins, alongside coconut water, aloe vera gel, and lentil sprout extract. None of them, not even 3% honey, increased root formation (Agri-Environmental Sciences, 2026).
How long rosemary cuttings take to root
Rosemary cuttings take 4 to 6 weeks to root, according to NC State. With bottom heat, roots can emerge sooner:
Source | Condition | Time until rooting |
|---|---|---|
NC State | Pot covered with a plastic bag, out of direct sun | 4 to 6 weeks |
Penn State | Bottom heat, 70 to 75 °F (21 to 24 °C) | 10 to 20 days |
Iowa State | Herbs and other non-woody cuttings in general | 4 to 6 weeks |
Brazilian studies (UTFPR, UNESP) | Nursery or shade house | Day roots were measured (not time to first root): 42 to 90 days |
Do not dig up the cutting to check. Starting at week 4, give the cutting a gentle tug: if you feel resistance, fine roots have already formed. Iowa State calls this the tug test. Fresh green growth at the tip and roots emerging from the pot's drainage holes also confirm the cutting has rooted.
Repot the cutting into its own container once roots appear through the bottom hole. If you slide the cutting out to inspect it, roots should measure at least 1 inch (2.5 cm), as advised by Iowa State.
Why rosemary cuttings fail to root or rot
Start with water. NC State points out that overwatering is a frequent cause of decline and death in rosemary. The RHS warns that cold, wet soil rots rosemary roots.
Signs of a cutting that failed, and what to do in each case:
Black, mushy base: this is rot. Discard the cutting and use less water next time, adding more sand to the mix.
Dry leaves and a wilted stem in week 1: direct sunlight or dry soil. Move the pot to a bright spot without direct sun, and water if the soil is dry. In Tocantins, rosemary cuttings in full sun suffered high mortality, and researchers identified sunlight as the main limiting factor for rooting.
Firm, green stem with no roots after 6 weeks: it may simply be slow. Brazilian studies evaluated roots between 42 and 90 days. Leave the cutting in the pot. For future batches, select green, non-flowering tips, as recommended by NC State.
Leaves rotting against the soil line: buried leaves. Remove every leaf from the section that goes below the soil surface.
Root rot also attacks mature rosemary. NC State lists root rot among the common diseases of rosemary:
Can you take cuttings from drying grocery store rosemary?
Yes, as long as you can find green, pliable stem tips. A cutting requires living foliage to produce roots. Tips with dry, brittle leaves all the way to the end will not work.
Cut the greenest tips, aiming for 4 inches (10 cm) where available. If green tips are short, 2.5 inches (6 cm) is the minimum: in the UTFPR study, 6 cm cuttings rooted successfully. Take more cuttings than the number of plants you want, since only 30 to 50% of cuttings typically root.
Check the base of the store container as well. If separate stems emerge from the soil, slide the plant out of the pot and loosen the root ball with your fingers. Separate each stem that has its own roots and pot it individually. Penn State includes division among the methods for multiplying rosemary.
Best time to take rosemary cuttings in Brazil
In Brazil, rosemary cuttings root both in summer and in fall. In a UTFPR study in Paraná, cuttings taken in summer (November to January) and in fall (April to June) rooted equally well. The authors concluded that the time of year did not influence rooting.
Another study, by Brazilian researchers, found late winter to be the best time (Acta Horticulturae, 1999). The abstract does not state where the study took place. In Brazil, late winter runs from August to September. NC State recommends late spring and summer in the Northern Hemisphere, which in Brazil correspond to the months of November to February.
If you can choose, opt for August to November, from late winter to spring. This guide follows the Brazilian studies, not the NC State calendar, because they measured rosemary in the Brazilian climate. In any month, avoid taking cuttings during a week of continuous rain: excess water rots the cutting.
Rosemary from seed and by layering
Rosemary seed germinates poorly and slowly. Penn State notes that few rosemary seeds are capable of germinating and that germination is slow. It also warns that varieties do not come true to the parent plant. In one study, germination of untreated seeds was 9.7% (Biological Agriculture & Horticulture, 2019). The RHS warns that a plant grown from seed takes several years before it is ready to harvest.
Layering involves pinning a low stem to the soil while still attached to the parent plant until it develops roots. The RHS recommends layering in spring or autumn. The RHS also notes that rosemary often roots on its own wherever a low branch touches the ground. Look for naturally rooted stems around the plant's perimeter and move them into a pot.
After rooting: transplanting and sun exposure
Move each rooted plant into its own pot filled with potting mix blended with perlite, a well-draining mixture recommended by NC State. After repotting, move the container into full sun: mature rosemary thrives in full sun, and Penn State plants rooted cuttings in direct sunlight.
Water the young plant only when the top layer of soil dries out. University of Florida Extension (UF/IFAS) explains that rosemary prefers dry conditions and suffers under frequent watering. From this stage onward, care for the cutting just like a mature plant:
Frequently asked questions
Can I plant rosemary without roots?
Yes. Propagating rosemary means burying an unrooted stem tip, which produces roots in soil within 4 to 6 weeks. The tip should measure about 4 inches (10 cm), have living foliage on the upper half, and carry no flowers. Plant immediately after cutting and keep the soil moist, never soggy.
Can store-bought rosemary herbs be used for cuttings?
Sometimes. Culinary sprigs have often been off the plant for several days. NC State explains that a cutting's survival rate drops the longer it takes to reach the soil. Pick the greenest, most flexible sprigs, recut just below a node, and plant several at once.
Can rosemary cuttings go directly into the garden bed?
Yes, but pots are safer. The RHS accepts rooting shrubs directly in outdoor soil inside a cold frame (an unheated glass or plastic enclosure). In an open garden bed, cuttings face harsh sun and rain. In Tocantins, rosemary cuttings in full sun had higher mortality rates, and rainfall can waterlog outdoor soil. Root cuttings in a pot in a bright spot out of direct sun, then transplant into the garden bed later.
How many rosemary cuttings should I take for one plant?
Take 2 to 3 cuttings for every plant you want. NC State expects only 30 to 50% of rosemary cuttings to root at home. To end up with two plants, cut 6 stems. They can share a single pot as long as their leaves do not touch, or go into individual small pots.
Where to start today
To get 2 plants, choose 6 green, non-flowering stem tips about 4 inches (10 cm) long. Prepare a small pot with half coarse sand and half potting mix, strip the foliage from the lower half of each cutting, and insert that portion into the mix. Place the pot in bright indirect light, keeping the soil moist but never waterlogged. In 4 to 6 weeks, try the tug test.
Related articles
How to Care for Syngonium: Light, Watering, Cuttings, and Pests
How to care for syngonium indoors: bright indirect light, watering when the soil surface dries, 64 to 81°F (18 to 27°C), and 40 to 60% humidity. Also cover water cuttings, thrips, yellow leaves, and pet toxicity.
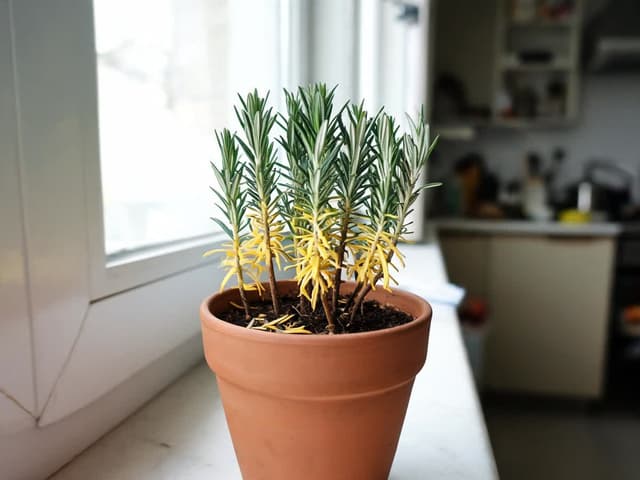
Rosemary Leaves Turning Yellow: Causes and Solutions
Rosemary with yellow leaves usually has overly wet roots. Check where the yellowing appears to see if it stems from wet roots, low light, spider mites, powdery mildew, or normal leaf shed, and learn how to save the plant.
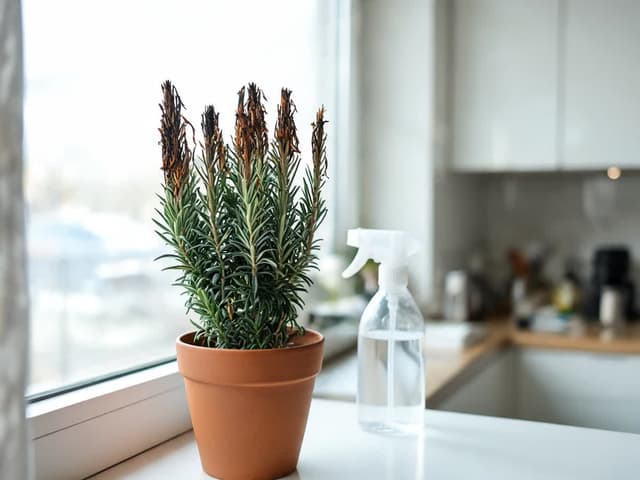
Is Your Rosemary Dying? How to Save Soap-Burned Rosemary
Rosemary with soap-burned leaves can usually be saved: the damage stays on the affected needles. Rinse the leaves, wait a week, scrape the stems, and prune only what is brown inside.