How to Propagate a Cactus: The Cut Must Dry Before Planting
Propagating a cactus is easy, and almost every failure happens at the exact same point: the piece was put into the soil with a fresh cut and rotted. Learn how long your plant's cut needs to dry, where to cut each cactus shape, and what to do when the base is already black.
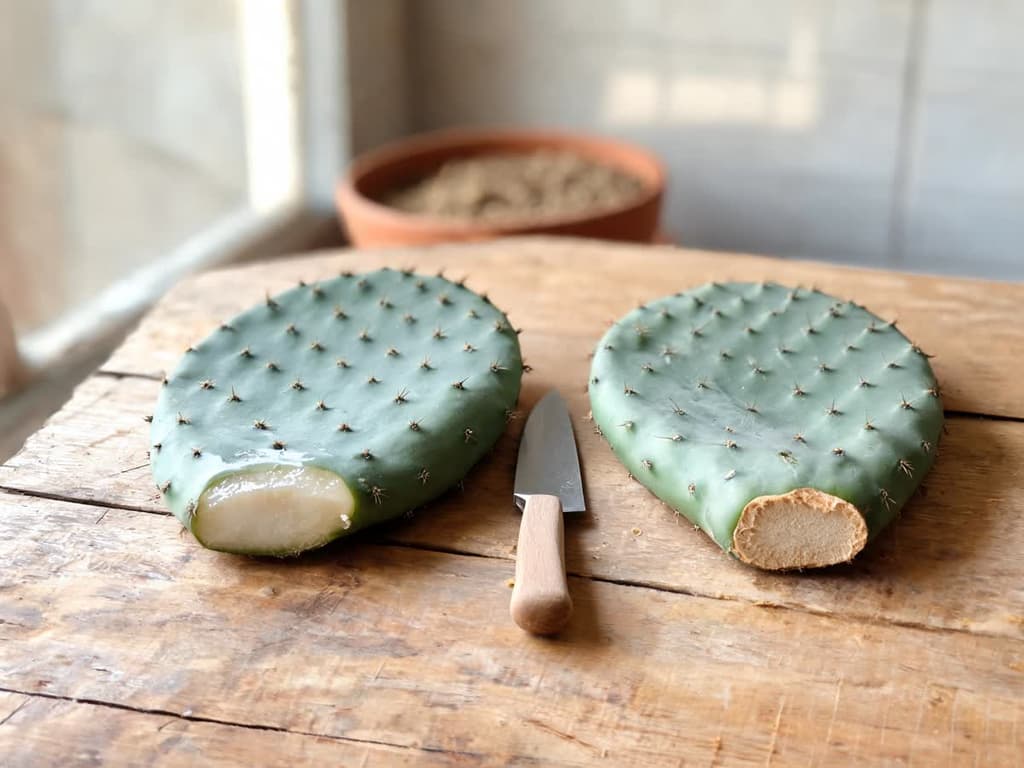
To propagate a cactus, you cut a piece of the plant and let the cut dry until it forms a hard callus. Only after that does it go into soil that drains water well. That middle step is the one almost everyone skips, and it is where cactus cuttings usually fail.
The University of Arizona Cooperative Extension is blunt about this in publication AZ1483: if you skip the drying step, the cutting can rot and have to be thrown out. This drying time depends on the thickness of the piece you cut. For a thin pad it takes days; for a thick piece of columnar cactus it can take weeks.
Quick summary:
Let the cut dry until it is hard and dry to the touch before planting. This is the single step that separates a cutting that takes root from one that rots.
Drying time depends on thickness: 5 to 7 days for a thin piece, 5 to 15 days for a pad, and weeks for a thick piece of columnar cactus.
Where to cut depends on plant shape: at the joint between pads, anywhere along a columnar stem (using a 45° angled cut), while globular types are not cut at all; you separate the offsets.
Do not water after planting. Wait at least one week.
Roots usually appear in 4 to 6 weeks in summer, and the sign that they have arrived is the cutting plumping back up.
The five ways to propagate a cactus
Before touching a knife to the plant, look at what you have in front of you today and pick the row that fits your situation.
Your situation | The method | What you get | How long it takes |
|---|---|---|---|
Intact, firm plant with good-sized pads or stems | Stem cutting | One new plant per cut piece | 4 to 6 weeks to root |
Smaller offsets growing attached to the mother plant | Offset separation | One new plant per offset, without cutting the mother plant | 4 to 6 weeks to root |
Black, mushy base, but the top is still green and firm | Top rescue | One plant, and it is the only usable part left | Weeks to root, with a longer drying time |
Seeds from a fruit or a purchased packet | Sowing | Many plants, including species only available this way | Germinates in 2 to 3 weeks; takes years to reach mature size |
A bright, colorful ball lacking chlorophyll | Grafting | The only way it can survive | Months, and the grafted pair lasts only a few years |
Cacti (family Cactaceae) are far too diverse for a single recipe, and plant shape changes where you cut. Looking up the species profile helps you know what you are dealing with.
Crown division, which works for propagating plants like the peace lily, rarely applies here. Potted cacti almost never form a root mass of independent shoots you can pull apart by hand.
Why the cut must dry before going into the soil
The callus is the hard, dry skin that forms across the cut surface when a piece spends a few days out of the soil. It seals the wound before the cutting touches moist substrate. Publication AZ1483 from the University of Arizona notes that this callus protects the plant against most soil-borne diseases.
A cactus stem is a water reservoir. A fresh cut is an open, dripping surface, which is exactly what soil fungi and bacteria seek out. If you plant the cutting the same day, damp soil presses directly against that open wound. The piece then rots from the bottom up before any roots can form.
Embrapa describes the same care in its 2016 planting guide for forage cactus: the cladodes stay in the shade, in an airy spot, for 5 to 15 days so healing can occur. The stated reason is to reduce contamination by microorganisms. The same guide instructs you to avoid spots prone to waterlogging during this period, so the pads do not rot while drying.
Other houseplants require the exact opposite. With yucca, the cutting goes into the soil fresh, because commercial production guidelines recommend shaving a thin slice off the base right before planting. With lucky bamboo, commercial growers seal the top cut with wax. With cacti, the cut stays exposed to the air until it hardens on its own.
How long to let it dry, for your plant
Published timelines vary because cut thickness varies. Here are the documented numbers, along with their sources:
The piece you cut | Drying time | Source |
|---|---|---|
Thin, from a succulent cutting or small cactus | 4 to 7 days | |
Entire cactus pad | 5 to 15 days | Embrapa, 2016 |
Thick top saved from a rotting plant | A few days to around a month | New York Botanical Garden, updated in January 2025 |
Thick piece of a columnar cactus | Weeks, and can reach several months | University of Arizona, AZ1483 |
A calendar serves as a reference, but your finger makes the call. The cut is ready when the surface is dry and hard to the touch, with no sticky or shiny spots. As long as any moisture glistens on it, leave the cutting in the shade.
Leaving it to dry longer than necessary will not hurt the cutting. Planting it too early rots its base.
Where to cut depends on your plant's shape
Cacti do not have branches like a bush, and the cutting point changes with the plant's shape. Use a very sharp knife or machete, and wear thick gloves: the spines go in easily and come out with difficulty.
Flattened pad (prickly pear, bunny ears, Indian fig). The cut goes at the joint between pads, as recorded by both the Embrapa booklet and Arizona's AZ1483 publication. A single pad is already an entire cutting. Embrapa recommends taking pads from the middle of the mother plant, avoiding the newest and oldest ones.
Columnar stem (mandacaru, pipe organ, San Pedro). Here, the cut can be made at any point along the stem, but the Arizona publication calls for a 45° angled cut: on a sloped surface, water cannot pool on top of the wound. The same publication notes that pieces taken from this year's or last year's growth tend to root best.
Globular (the spiny ball, like a barrel or ball cactus). Do not cut these. According to AZ1483, globular species are propagated by removing offsets and immature plantlets that sprout on the mother plant, which the next section covers.
Disinfect your blade before starting and again between plants. Embrapa advises dipping the knife into a half-water, half-bleach mixture. The Arizona publication recommends a 10% bleach solution every few cuts to limit bacterial diseases. A dirty blade transfers disease straight from one plant to the next.
Which end of the cutting goes down
Plant the cutting upright, with the cut base pointing down, the same way it was growing on the plant. The gardening handbook from the North Carolina State University Extension instructs, for stem cuttings in general, not to bury the cutting upside down.
This is a general stem propagation rule. I have not found an extension publication that has specifically tested inverted cactus cuttings. The guidance exists, and following it costs nothing.
On a freshly cut columnar cactus piece, both ends look alike. The way to avoid mistakes is to check the areoles, the small fuzzy pads that spines emerge from: they grow slanted, pointing up toward the plant's apex. If you take several cuttings at once, mark the top end of each before setting them out to dry.
Separating an offset from the base of the mother plant
You can remove an offset without killing either plant, and this method gives you the highest chance of success. It is the standard approach for globular species: Arizona publication AZ1483 describes propagating globular cacti, such as Echinopsis, by removing the small, immature offshoots growing tightly attached to the mother plant.
Put on gloves and clear the soil from around the base so you can see where the offset meets the mother plant.
Try gently twisting the offset. Many pop off whole, bringing some roots along with them, and those do not require a knife.
If it does not come free, cut at the junction using a sanitized blade, staying as close as possible to the mother plant.
Let it dry in the shade. An offset that came off with roots can go into the soil right away; one that came away with an open wound follows the same drying rule as any other cut.
The Arizona publication notes that cuttings taken when nights are at 16 °C or warmer root well. Outside that window, according to the same publication, rooting can take longer or simply not happen. In Brazil, that means spring and summer in most of the country. In the South and in the high-elevation areas of the Southeast, winter nights fall below that, and it pays to wait.
The base rotted: can you save the top?
Yes, if the upper portion is still green and firm. You cut away the damaged plant tissue from below and treat the salvaged top like a regular cutting. The bottom portion is lost.
The reference from the New York Botanical Garden describes the cut: slice upward from the bottom using a sharp blade, inspecting the cross-section after each cut. As long as you see brown, orange, or translucent discoloration in the tissue, slice off another section. Stop cutting once the cross-section looks firm and clean from edge to edge.
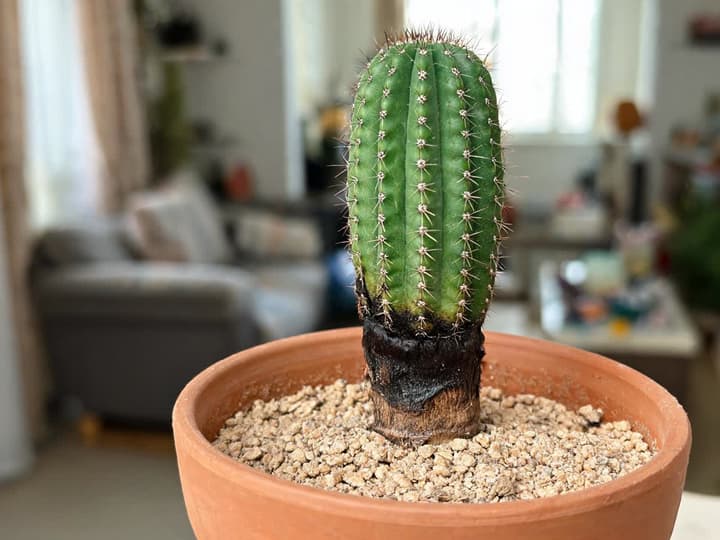
The most common cause of this softening is root rot. It sets in when potting soil stays wet around a plant that cannot tolerate sitting in water.
In this situation, the drying period takes longer than for a cutting taken from a healthy plant. The cut surface is broader and the tissue holds more moisture. The New York Botanical Garden reference points to about a month. The severed top waits out that period in a dry spot out of direct sun.
Do not bother if the softening has already climbed past the midpoint of the plant and no firm tissue remains. Skip it, too, if the top yields when pressed with a finger. A mushy cutting cannot recover.
Planting the cutting: soil, depth, and the first watering
Cactus cutting soil should be half non-retaining drainage material and half organic matter. Arizona publication AZ1483 describes the standard production mix: 50% pumice or perlite and 50% peat moss or compost. The same publication warns not to use animal manure in the mix, as it introduces salts and other compounds that interfere with rooting.
Planting depth serves one purpose: keeping the cutting upright. According to Arizona, burying 1/3 to 1/2 of the pad's base provides enough stability. Columnar cacti often require slightly more depth so they do not fall over. For in-ground field planting of forage cactus, Embrapa buries 50% to 2/3 of the pad.
Plant into slightly damp soil, never waterlogged, and do not water after planting. Wait at least one week. A rootless cutting cannot take up water; it survives entirely on the water stored inside its own tissues. Standing water around the base will only rot the cut you just spent days letting heal.
Keep the pot in a bright spot, away from harsh midday sun. Rooting is the only phase where a cactus needs less light than an adult plant. Mature cacti are among the few houseplants that tolerate full direct sun all day. Arizona recommends the dappled shade beneath a tree for rooting, noting a side effect of deep shade: the cutting narrows in diameter, and that narrowing never fully disappears. Some species, like Cereus peruvianus and Stenocereus, root successfully in direct sun.
How long it takes a cactus cutting to grow roots
For most species, roots appear in 4 to 6 weeks in summer, according to Arizona publication AZ1483. With certain columnar species, progress is much slower: the same publication records that the organ pipe cactus (Stenocereus thurberi) can take several months to root.
You do not need to dig up the cutting to check. Arizona notes two clear signs: the growing tip shows fresh growth, and the cutting plumps back up. A cutting that has rooted is one that has resumed taking up water and filling out its tissue.
Until roots develop, the cutting will shrivel slightly, which is completely normal. Softening, however, is not normal. Firm and wrinkled means you wait; soft and dark at the base means the drying step was cut short or water arrived too soon.
Once the cutting roots, switch to normal adult cactus watering: soak the soil until water runs freely from the drainage hole, then wait until the pot dries out all the way to the bottom before watering again. That step-by-step watering rule applies from this point on.
Seeds: how long until they become a real plant
Cactus seeds germinate quickly but grow very slowly, and that contrast catches beginners off guard. Arizona publication AZ1483 notes that seeds germinate within 2 to 3 weeks, depending on the species, when nighttime temperatures stay between 18 °C and 21 °C (64 °F to 70 °F).
What comes after is what people rarely mention. According to Arizona, the tiny seedling is only transplanted once it reaches about 1.3 cm (0.5 in) in diameter. It does not move into its own individual pot until reaching 2.5 cm (1 in). That timeline is measured in years, not weeks.
A figure from the US National Park Service puts this timeline into perspective. A saguaro measuring 2.5 to 7.5 cm (1 to 3 inches) tall is between 5 and 10 years old. The saguaro is an extreme example of slow growth, but no seed-grown cactus is fast.
Seeds make sense if you want large batches of plants or are chasing a species unavailable as a cutting. If your goal is simply to get another plant just like yours, a stem cutting achieves in weeks what seeds take years to produce.
The slow pace here belongs to the seed, not the cactus itself. A single ZZ plant leaf takes about six months to push out its first new stem, whereas a cut cactus piece roots in 4 to 6 weeks.
The colorful cactus in your home is already a graft
The pink, yellow, or red ball on top of a green stem is two plants, not one. According to the North Carolina State University Extension plant catalog, the colorful top part is the graft, lacks chlorophyll, and relies on the cactus below for food.
The University of Arkansas Extension describes how this combination is made: the colorful ball is a chlorophyll-free mutation that only survives grafted onto a green cactus, usually Hylocereus undatus, the dragon fruit cactus. The same publication notes that the top part eventually outgrows the grafted base. Because of this, most of these colorful cacti live only a few years, unless grafted again.
This creates an important practical detail for anyone hoping to propagate: the colorful ball cannot survive as a plant on its own. Stuck into soil, it has no way to feed itself. Propagating it requires repeating the graft: cut the top off a vigorous green cactus, slice the base of the colorful pup, and press the two surfaces together, binding them until the tissue knits.
If white milk comes out when you cut, it is not a cactus
Much of what is sold as cactus in Brazil is euphorbia, and the difference shows the moment you cut. The University of Arkansas Extension is explicit about the pencil cactus: it is not a true cactus, but rather a member of the euphorbia family.
Take that distinction seriously before cutting. In that same 2002 publication, the extension horticulturist recounts suffering anaphylactic shock. After getting the sap on his hands and near one eye while taking Euphorbia tirucalli cuttings, he experienced eye burning, lip numbness, and difficulty breathing. Diterpene esters were identified as the compound responsible.
The way to tell the two apart is to look at where the spines originate. True cacti have areoles, small, light-colored fuzzy cushions from which spines and flowers emerge. Cactus sap is clear or watery. Euphorbias lack areoles and release an opaque, milky white latex the moment the blade cuts in. If milk appears, stop immediately, wash your hands, and put on gloves and eye protection.
When you are unsure what plant you are holding, a photo gives you an answer faster than a written description. Bloom identifies the species from an image, and the free tier includes two identifications per month. The app is available exclusively for iPhone and iPad.
Frequently asked questions
How do you propagate a cactus without roots?
That is the standard process. A cutting starts with zero roots and produces its own once planted. Make the cut, let the surface dry until it feels firm and hard to the touch, then plant it with 1/3 to 1/2 of the base buried in fast-draining soil, and hold off on watering for at least a week.
How do you get a cactus to grow roots?
You need three conditions working together: a fully callused cut, fast-draining soil, and warmth. Arizona publication AZ1483 documents that cuttings taken during periods with nighttime temperatures at or above 16 °C (61 °F) root reliably. Most species take 4 to 6 weeks in summer.
Can you cut a cactus and replant it?
Yes, and that severed piece is the exact material used for propagation. What you cannot do is cut and plant on the same day. As University of Arizona publication AZ1483 notes, a fresh cut placed into damp soil will rot before it has a chance to root.
How long does it take for a cactus cutting to root?
Most species take 4 to 6 weeks during the summer, according to the University of Arizona. Thick columnar varieties can take several months. You will know roots have established once the cutting plumps back up, without ever having to dig it up to look.
What is the best time of year to propagate a cactus?
Spring and summer, when nights stay above 16 °C (61 °F), which is the criterion recorded by the University of Arizona. In Southern Brazil and in the higher elevations of the Southeast, winter nights drop below that and rooting stalls. The species fact sheet also points to spring.
What you can do today
Cut a piece, feel the cut, and leave it in the shade until that surface becomes dry and hard. Note the day of the cut on your calendar. For the next two weeks, you do not need to do anything else with it.
If your plant has a blackened base, cut it today, making the slice above the mushy section. The longer you wait, the less viable tissue remains to save.
Sources
Kelly, J. How to Propagate Agaves and Cacti from Cuttings and Seed (AZ1483). University of Arizona, Cooperative Extension, January 2009. Publication
Voltolini, T. V. et al. Plantio e Manejo da Palma Forrageira no Semiárido. Embrapa, Brasília, 2016. Booklet
Anderson, C. Propagating Succulents and Cacti. University of Illinois Extension, June 4, 2015. Article
Extension Gardener Handbook, Chapter 13, Propagation. North Carolina State University Extension. Chapter
Gymnocalycium mihanovichii. Extension Gardener Plant Toolbox, North Carolina State University. Profile
Klingaman, G. Grafted Cactus, Neon Cacti, Moon Cactus, Hibotan Cactus. University of Arkansas Extension, November 27, 2015. Article
Klingaman, G. Pencil Cactus (Milkbush). University of Arkansas Extension, February 1, 2002. Article
My cactus has a lot of browning, can it be saved? Mertz Library, New York Botanical Garden, updated on January 10, 2025. Answer
Saguaro Growth. United States National Park Service, Saguaro National Park. Page
Related articles
How to Care for a Maidenhair Fern: Light, Water, and Revival Tips
Learn how to care for a maidenhair fern indoors: bright indirect light, consistently moist soil, high humidity, and how to revive it if it dries out completely.
How to Propagate Spider Plants: Root the Pup Before Cutting
The safest spider plant cutting comes from a pup still attached to the mother plant: rest the plantlet on soil in a small pot, wait for roots to establish, and only then cut the stolon. Learn when the pup is ready, whether rooting in water is worth it, how to divide the clump, and why plants fail to produce babies.
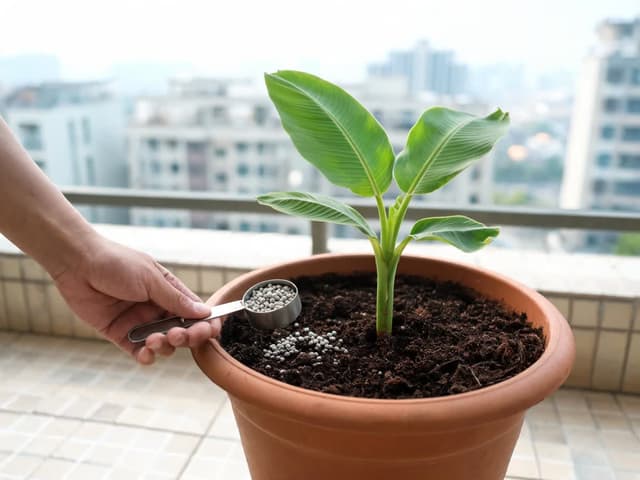
Banana plant fertilizer: fertilizing potted and backyard plants
Banana plant fertilizer needs more potassium than nitrogen, in a 3-1-6 ratio. For a potted plant on a balcony, use the label dose in spring and summer. In the backyard, fertilize every 2 months, adjusting the amount by mat age. Learn the formula, timing in Brazil, and signs of deficiency or excess.